Disclosure: This post may contain affiliate links, meaning if you decide to make a purchase via my links, I may earn a commission at no additional cost to you.
So far, I’ve refinished hardwood floors and done a lot of painting. Then came the bathroom—and I had a strong negative reaction to it. I really didn’t like it. Unfortunately, I wasn’t given an unlimited budget, and bathroom remodels are expensive. I knew we couldn’t rip out all the old tile, but it looked seriously outdated.
I mentioned the awful tile to a friend and said, “I don’t know what to do.” She told me, “You could glaze it.” I asked, “What is that?” So, I started Googling tile glazing and came across Rust-Oleum Tub & Tile Paint. I watched a video of a woman doing a bathroom makeover using it—she gave some honestly invaluable tips, and I was sold.
Prepping
I ordered the paint on Amazon because it was cheaper than the big box home improvement stores. While I waited for it to arrive, I started prepping the bathroom. I used a heavy-duty acidic cleaner and scrubbed all the tile from top to bottom. When I was done, I was actually shocked at how good it looked—so clean! But still, the awful tile colors had to go.
The next step (according to Rust-Oleum’s instructions) was to remove all the caulk from the areas I’d be painting, so I got to work. Then I went over the tile with Comet and cleaned it again. After that, I used a palm sander with 40-grit sandpaper to lightly rough up the surface.
Once sanding was done, I vacuumed the tile and wiped everything down with a lint-free microfiber cloth. Then I taped off all the areas I didn’t want to paint and covered them with plastic.
Mixing up the Paint
By the time my package arrived, the bathroom was fully prepped. I remembered the video I had watched and followed the mixing instructions: I mixed Part A by itself, then Part B by itself, and finally mixed them together. After thoroughly combining them, I let the mixture sit for 15 minutes with the lid back on while I gathered my supplies.
I put an air purifier in the room, opened the bathroom window, put on gloves, got my paint tray, foam roller, respirator mask, and a fan to blow the fumes out. After the 15 minutes passed, I poured a small amount of paint into the tray and began rolling. It went on very smoothly.
Applying the Paint
I rolled the entire bathroom, but I noticed some areas didn’t cover as well as others. The directions said to wait an hour before adding a second coat, so I did. I went back over the lighter spots, then let it dry.
While it was drying, I removed the tape to check for any areas that had been over-taped. I touched up those spots with a tiny paintbrush. After that, I was officially done with the painting and just had to wait three days for it to fully cure.
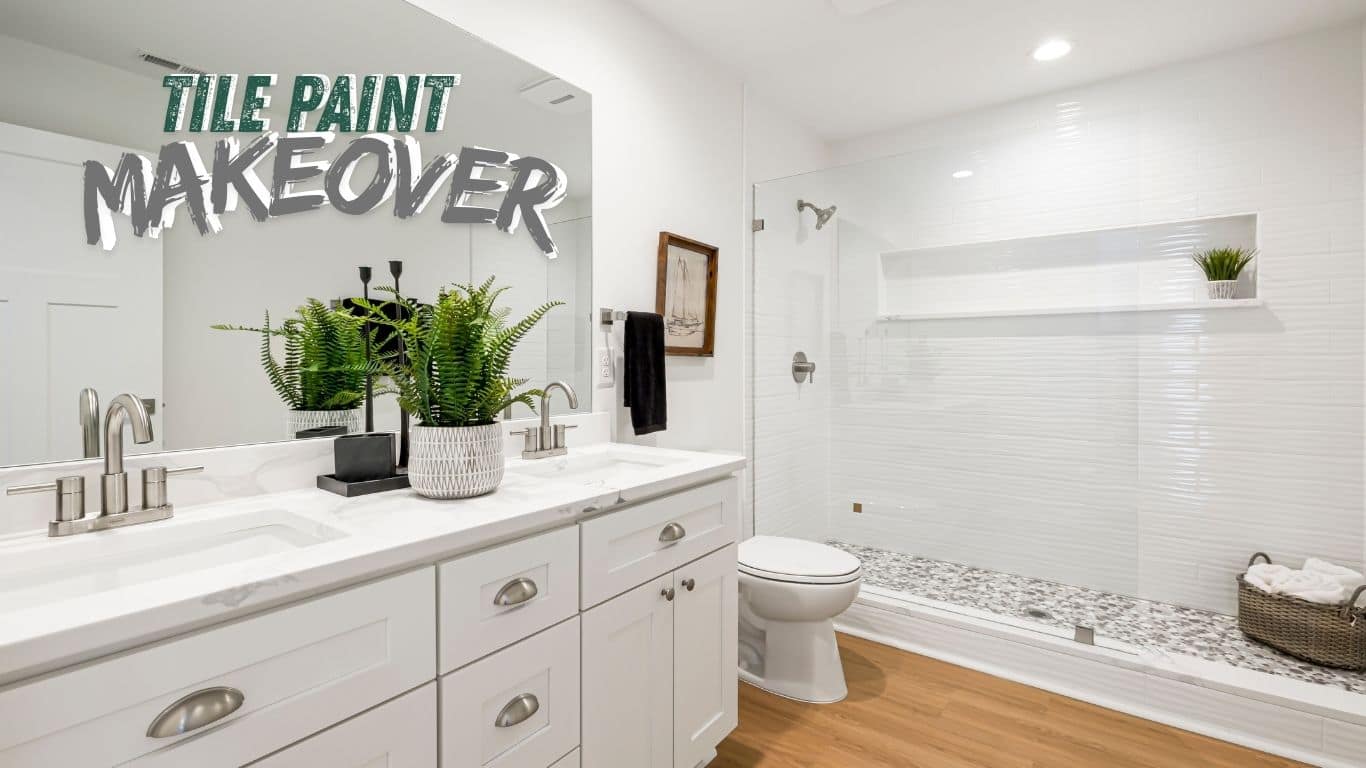
I had no idea what a difference this tub and tile paint would make. When I came back to look at it, I was shocked. Something so simple made me so happy—I no longer hated the tile! It looked crisp, clean, and fresh. I was thrilled.
I highly recommend this to anyone with outdated tile who doesn’t want to do a full remodel. It’s an amazing and inexpensive solution to an ugly bathroom.
Bathroom Before:

Bathroom after painting:

I still need to re-caulk the areas where I removed the original caulk and clean up the remaining tape. I’ll take another photo once everything is finished.
If you’re considering doing this—take the leap! Just be prepared: the smell is strong. But once it’s done, I promise, it’s so worth it. It honestly feels like a whole new bathroom!
Leave a Reply